Planning Center Live Automation with Qlab
With the use of Propresenter, Midi, Qlab and Safari we advance our PCO automatically.
Things Needed:
- 1 or 2 Mac Computers
- Propresenter 6 (With the Midi Module) or Propresenter 7
- Qlab (Must have Audio or Video, or Lighting license)
- Safari
- IAC Driver (If using only 1 computer) , or Network Midi Setup (If using 2 computers)
Step 1: Purchase and download the Qlab file provided here. Feel free to setup Qlab on your own and type in all the scripts, but I have already done the hard work for you!!
Step 2: If you plan on using Qlab on the same computer as Propresenter you will need to create an IAC Audio Driver. To do that open up the Audio Midi Setup App that is already installed on all MAC OS computers.

If you plan on using Qlab on a different computer you will need to create a Network Midi connection which is also done using the Audio Midi Setup App. This needs to be done on both computers. Once setup click the connect button on one of the computers.

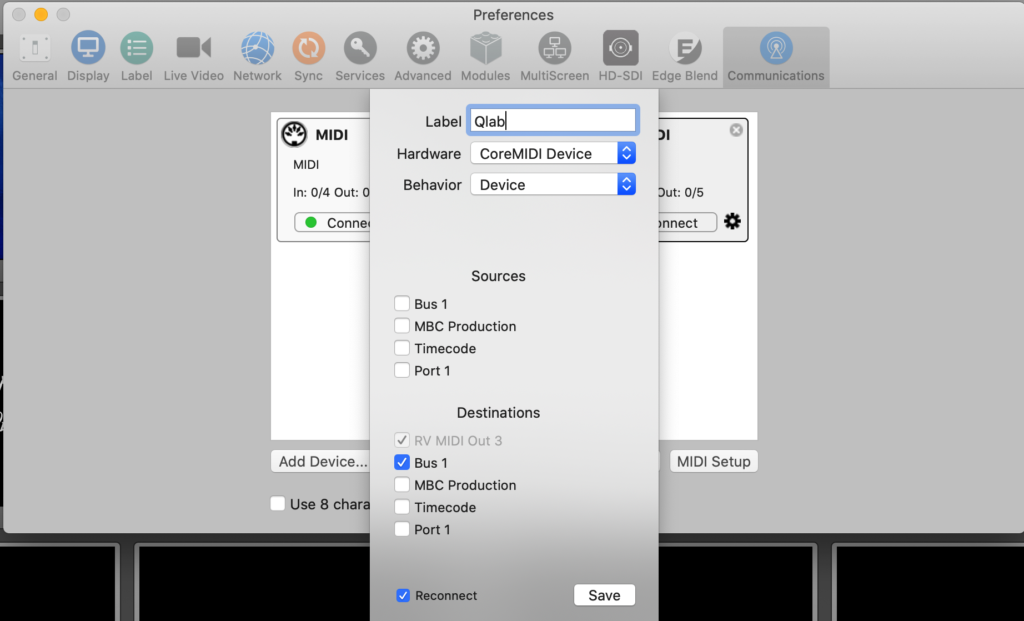
Step 3: Head over to Propresenter and open up the preferences and make sure you purchase the Midi Module (If using Pro6) Pro7 this module is already included. In the Midi setup check the box of the incoming sources for which ever midi setup you created/labeled within the Audio Midi Setup App in Step 2. Then hit connect.

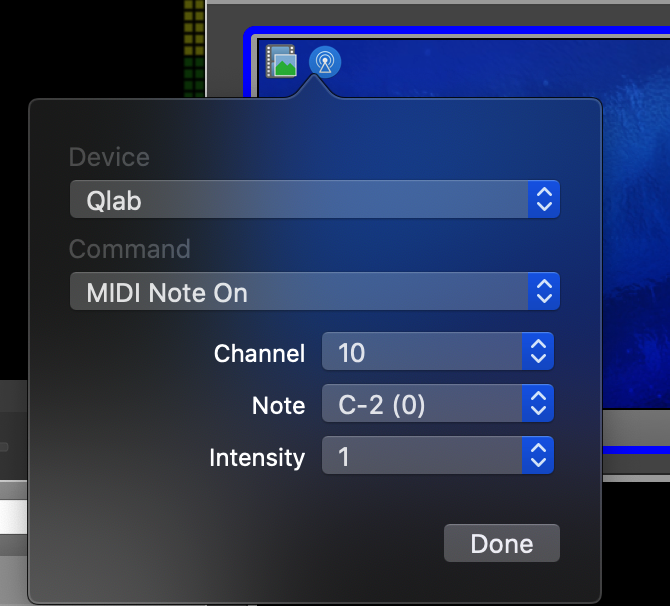
Step 4: You will start adding midi notes to the first slide of each song/element. (Your playlist items will need to match the Planning Center Services order of service) The downloaded Qlab file is setup to look at Channel 10, Note 0, Velocity 1.
Right click on the first slide and go to communications then midi note on. Select Channel 10, Note 0 Velocity 1. Now do that same thing on the first slide of every element within your playlist. (If you have looping announcements slides preservice do not add a midi note to the first slide, also make sure this is not listed within Planning Center Services)

Step 5: Head over to the downloaded Qlab file and save it to your documents folder or where you would like it saved to. Next under the midi settings select your network or IAC driver midi connection.
Step 6: Open up Safari (Has to be Safari) on the computer running Qlab. Under Preferences click on Advanced and check the box “Show Develop menu in Menu Bar” Then close preferences. Click on Develop on the menu and click on “Allow JavaScrip from Apple Events”
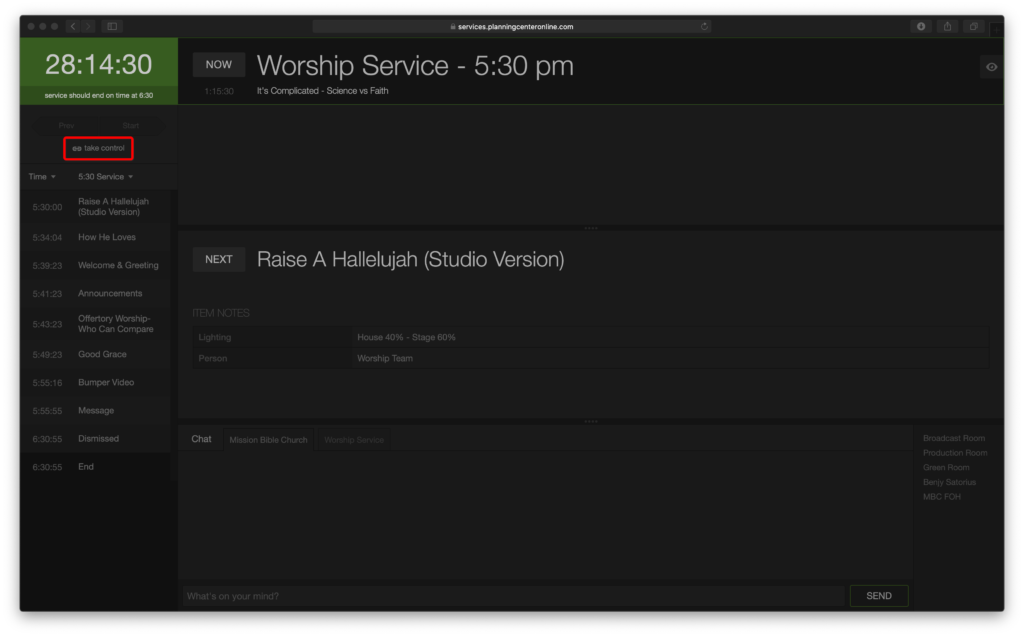
Step 7: Log in to Planning Center Services and go to the current weekend and click “Live”. Safari and Qlab can be minimized but must stay open.

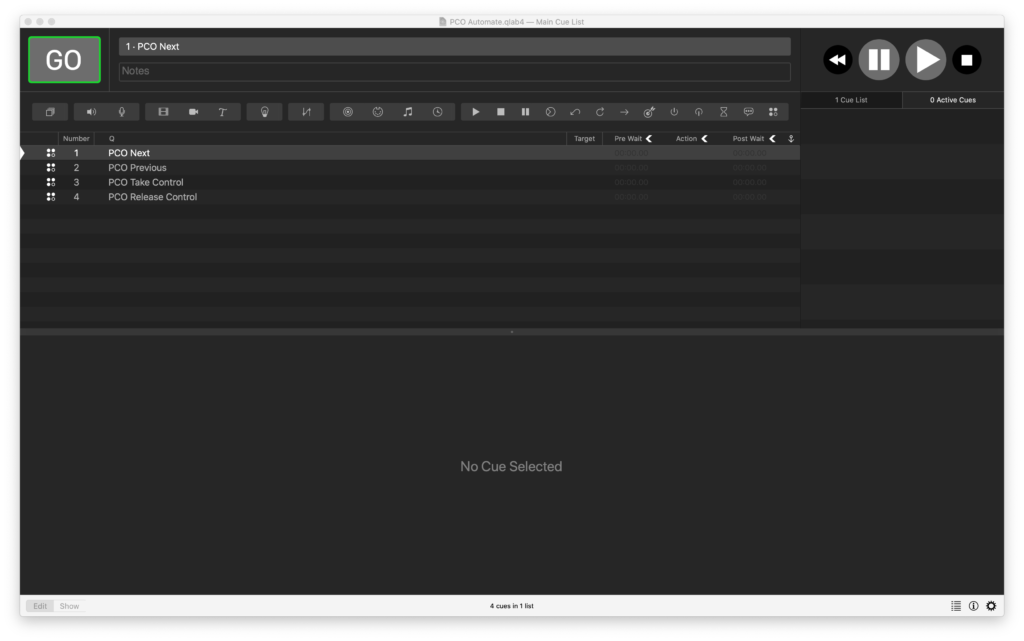
My Qlab file has 4 cues within it.

- PCO Next (This is what will be advancing the order)
- PCO Previous (By default this is not used)
- PCO Take Control ( This is triggered by the wall clock approximately 5 min before service start. If you have services on multiple days this can be duplicated and adjusted by service day)
- PCO Release Control (This should be set to 20 or so minutes when your last service is over.
The “take control” should only “live” during services. All other times (Practice and mid week) no one should be in control of PCO or it will advance every time you practice a song.

Each cue within Qlab is triggered by a midi note that Pro6/Pro7 is sending, then Qlab sends a script to Safari that hits the “next” button to advance the service!
Week to week all that needs to happen is to confirm that each element has a midi cue on the first slide, Safari is open, the current weekend of Planning Center Live is loaded and Qlab is opened.
Visit my store to purchase the already completed files!


