Easter Stage Design
Overview
Create an eye catching stage set that was functional for the needs of the weekend service teams, reflected some of the branding of the Easter material and following series, had a wide range of lighting options, quickly producible, and fairly cheap.
Goals
- Budget conscious – Total cost came to around $180, not including the lighting that we already had.
- Easily repeatable design – we went with a symmetrical design that needed to have exact lengths on both sides. Coming up with a way to repeat proper drill locations and cut lines was important.
- Quickly installable – due to the nature of weekend services, we had to tear down and install the new one within a couple days so that the stage was functional again for other groups in the week.
Materials Used
- 40 – 2” x 10’ White PVC Pipe – link
- 5 – 50’ 19 gauge – dark annealed wire – link
- 14 – LED can lights
- 8 – Coidak CO820 Amazon LED Cans Lights – link
- 4 – LED Bar lights – link
- 4 – American DJ LED Cans – link
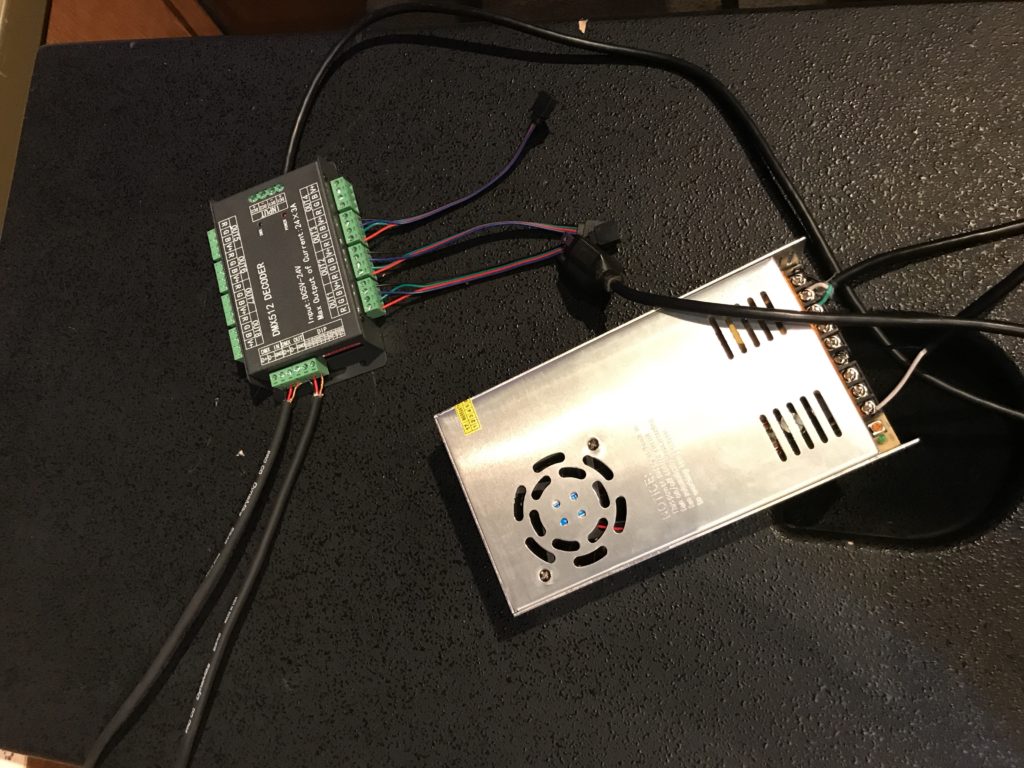
- 1 – 24ch DMX Decoder – link
- 1 – Decoder Power Supply – link
- 4 – LED strip lights – link
Tools
Basic construction tools were needed in this process as well:
- Circular saw – we used a 10” miter saw
- Drill – we used a table top 10” drill press to work faster
- Wire snips
- Clamps
- Work gloves
A little bit of prep…
// Ryan Coleman
We have a lot of creative people at our church. Our lead pastor is an artist himself on the side. He’s does a lot with the stage design in the past but this time he was more hands-off and gave us the opportunity to try some new ideas.
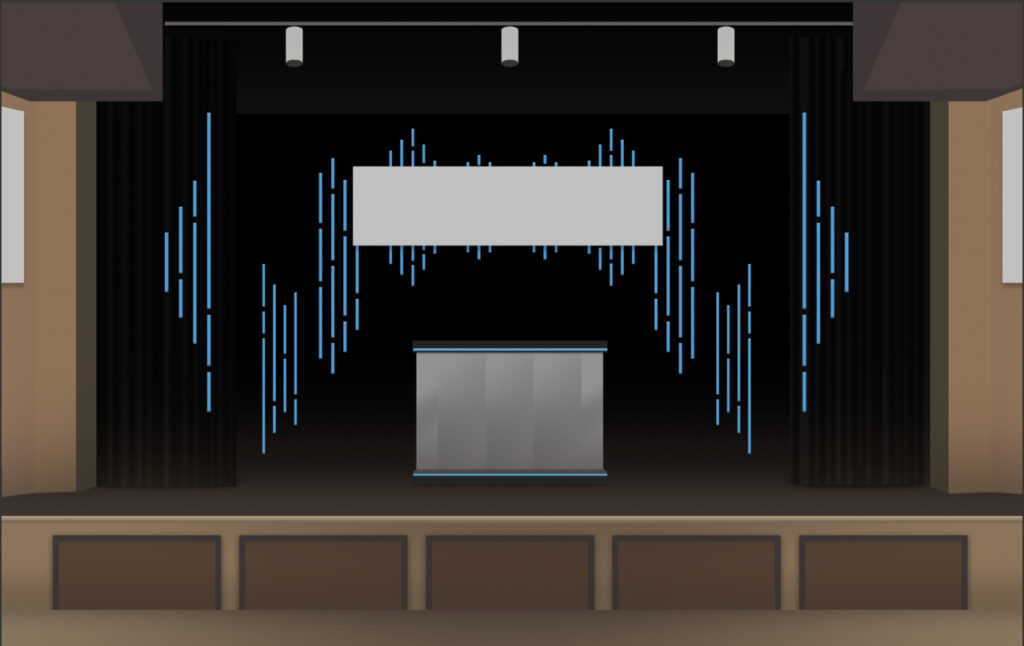
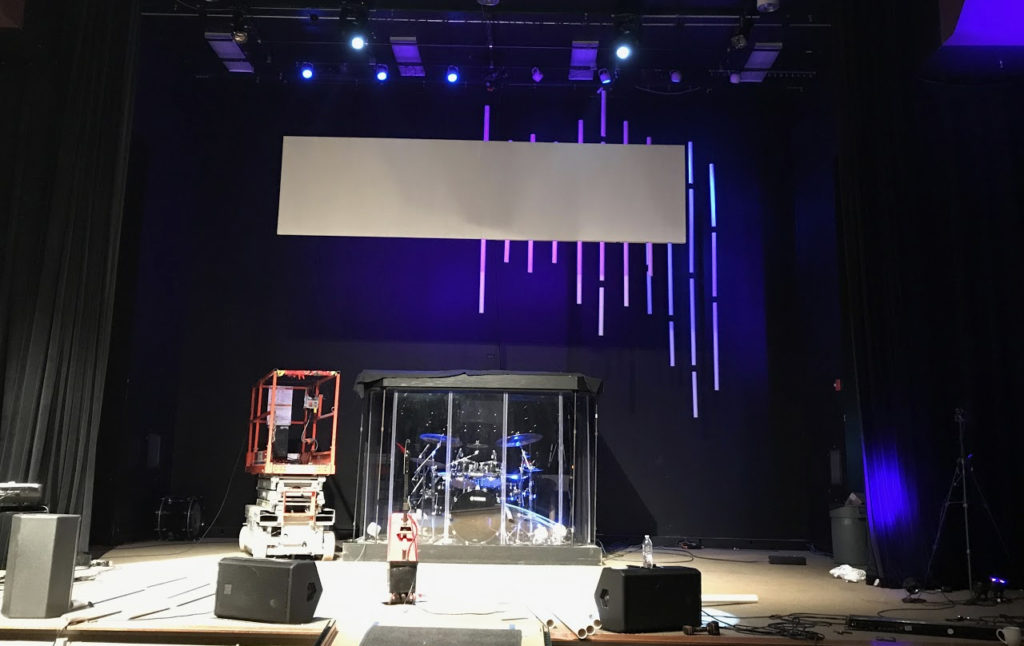
I first pitched this rough render to him a couple weeks prior to building. I just took a quick iPhone pic in the middle of the room and ‘shopped it so that I could work out what I had in my head. The nice thing here is that we can now use this PSD file for future concepts.
If you have someone who knows their way around Photoshop, I highly recommend doing this so that you can visualize the final product better and perhaps use it to show other less “visually inclined” staff members who may be on the fence. Sketches only go so far for some people, even myself :)
Anyways, after researching, aka Pinterest, a few styles I landed on the “lines” motif. I’m a minimalist and lean toward clean, modern design so this was really attractive to Benjy and I.
We brainstormed a few alternatives but landed on the PVC method. It was really easy to actually build and the method was pretty quick.
And off we go…
First, we went to buy the PVC. We went with the symmetrical look and that helped reduce measuring every piece differently because we could cut two of everything then.
We purchased about 40 2” round, 10’ pieces. 40 was the number of lines from the render so we figured we should get enough for each line, and any scrap from other shorter rows would be useable on some of the longer sections.
We could have done the render much more mathematically accurate but based on some general cut lengths we were able to get something fairly close. It ended up being pretty fast for us.
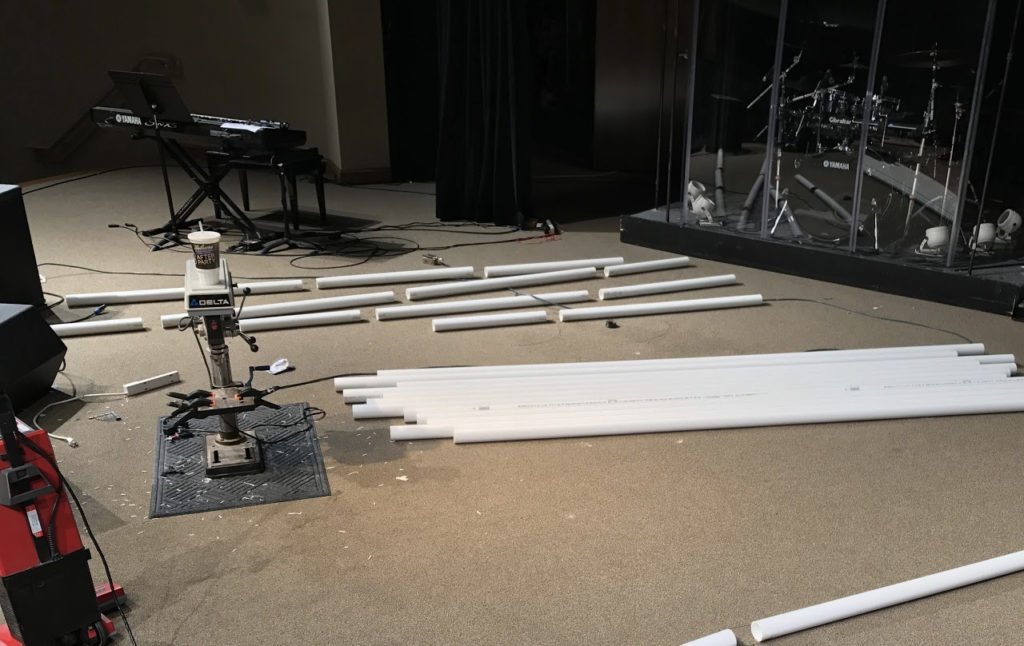
Once we got general lengths planned, Benjy marked two of every pipe handed them to me and then I cut them to length at the miter saw.
We recommend doing this either outdoors or in a room you don’t mind getting pretty messy. PVC dust goes everywhere!
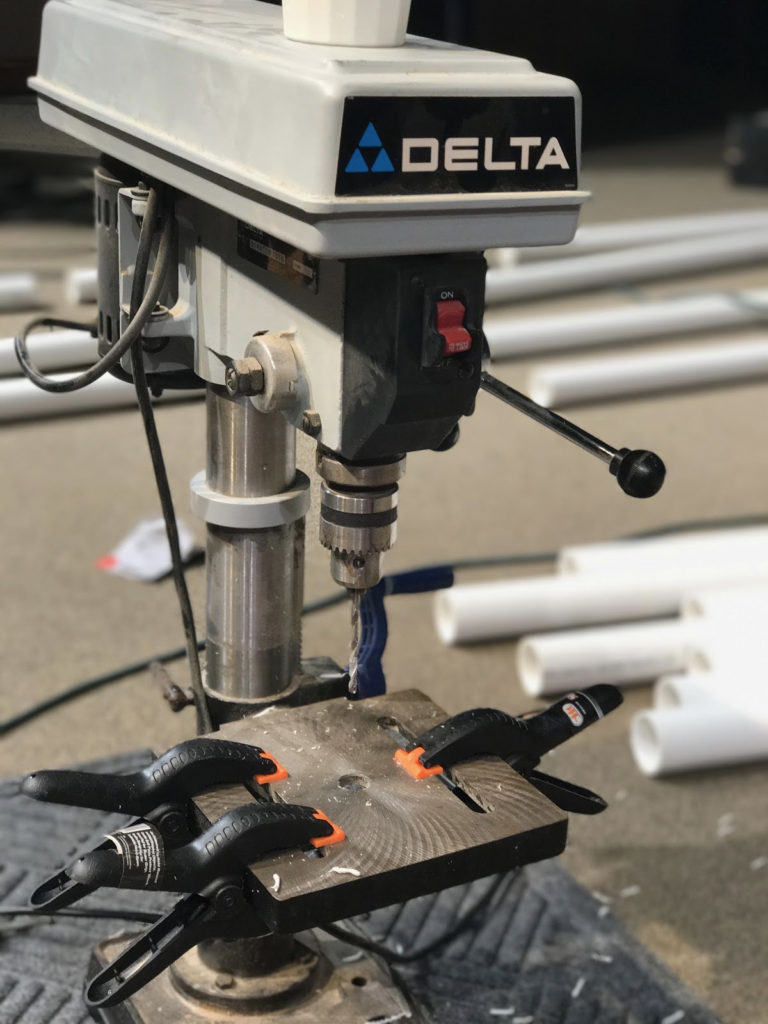
Once we got a section all cut to length (both left and right sides), we took them to the drill press to get the holes cut.
We set up simple clamps on the drill top to help with repeated cuts. One to stop the tube at the correct length up and down, and two to help center it under the bit. This made drilling a breeze.
Teamwork takes the cake here. One person hands the pipes to the operator, and once drilled, swaps it with a fresh one. We became a well oiled machine after doing it so much. We made sure to drill the holes so that the markings on the PVC were facing backwards as to not be shown while lit. One hole on each side of the pipe was all that was necessary.
The pipes all had holes drilled on the top and bottom, except for the bottom-most pieces of every PVC column. Nothing would be hung from there so it wasn’t necessary.
After that we laid out the pieces according to the original concept on the floor. We cut lots of 2’ lengths of dark wire to thread through the newly cut holes.
In order to get even spacing between each section, we used a spacer. This could be anything you want. We just cut off a slice of 2×4 to do it. We pushed the tubes up to the wood threaded the wire and tied it off. Really simple stuff.
This made the spacing pretty uniform across all of the gaps. If there was any different it was marginal.
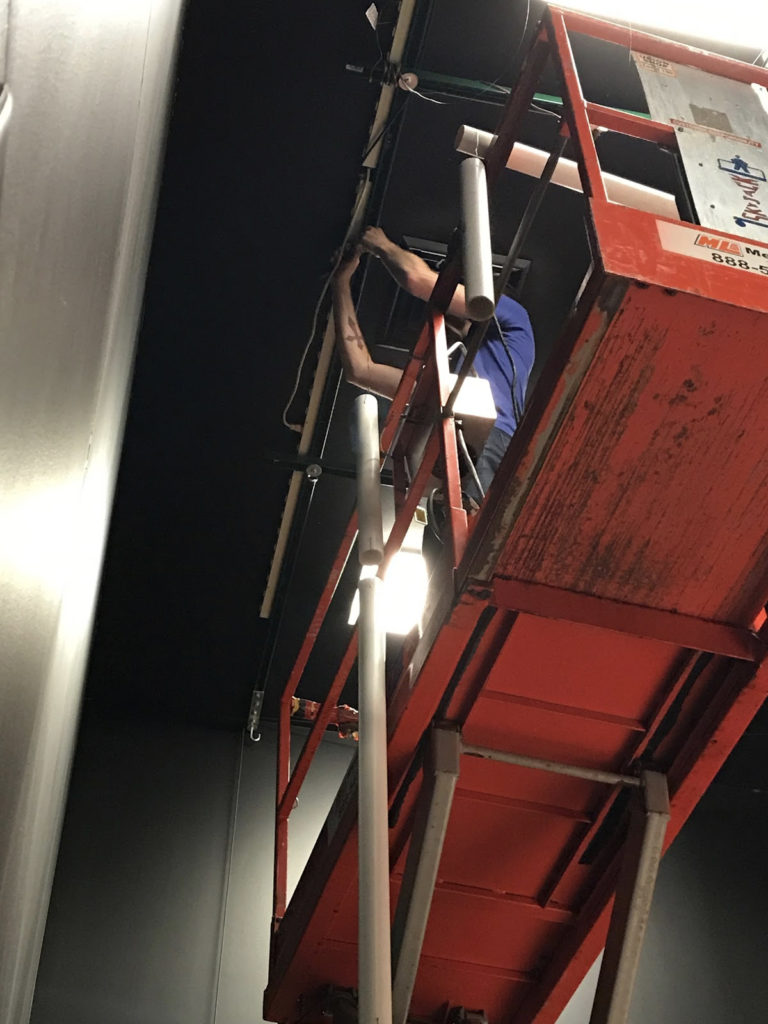
To hang, Benjy took up the PVC sections on the lift and started from the back of the stage and worked his way forward. This helped so that we wouldn’t have to try and navigate the scissor lift between congested areas.
We used the same dark wire to hang all of the sections from the ceiling. This used up most of that material actually because some of the columns were hanging so far down from the ceiling.
You may have better materials to hang but this wire is really great because it’s strong, thin, and doesn’t reflect any light so it really makes the floating pipe look come to life.
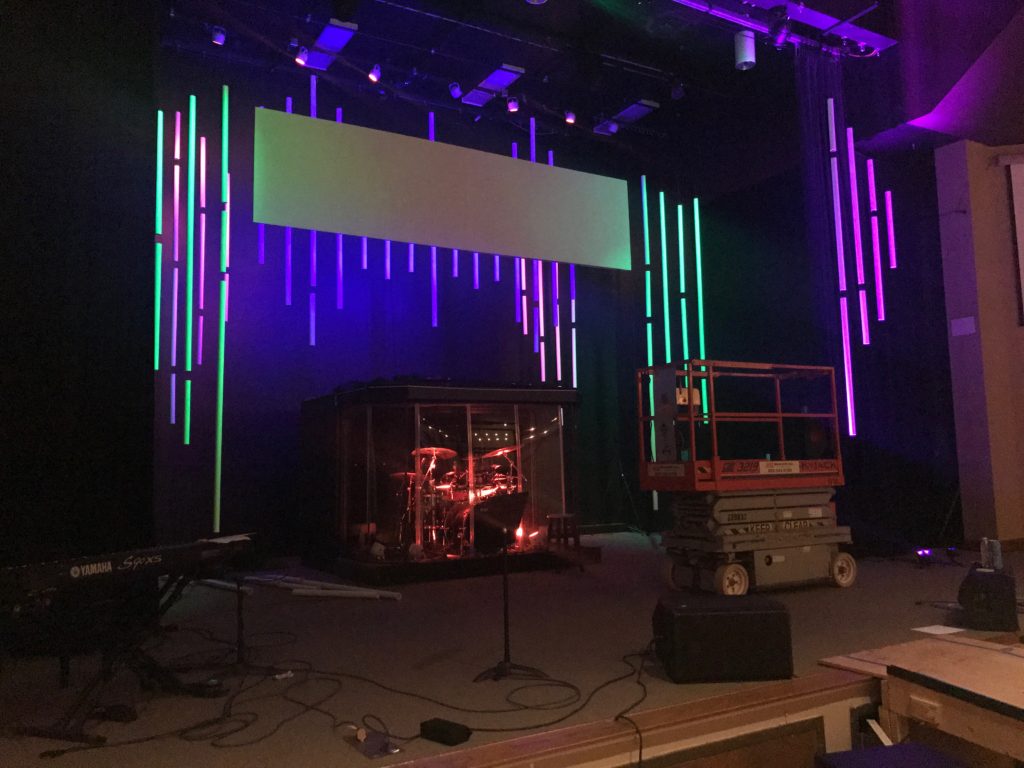
This was an early lighting test. Seemed like a promising start. We just had to plan how to evenly light all of the parts. The biggest issue we ran into was some of the front-most sections were getting washed out with some white stage light, so we combated that by shooting it with even more LED cans :)
It took a lot of strategic planning to get them evenly lit, and with proper DMX channels we are able to shoot each section with different color to really accentuate the depth effect going on.
Benjy has the details on the actual models and that process. Just be prepared to try different angles, locations and colors so that if you do it on your stage, it’s well lit from a majority of the seating.
It’s all in the details…
// Benjy Satorius
The program we use to control our lights is DMXIS made by Enttec. Each LED light is on its own channel so we are able to have more control over color.
We started out by hitting the farthest back section with 7 LED cans that are mounted up by the ceiling. These worked great for lighting the top half of the two sections, and we used two bar lights for up lighting to get the bottom half evenly covered.
The center section behind our ultrawide screen is lit by 3 strips of LED tape mounted on the rear of the screen. This creates a clean look visually and also lights up the whole section evenly.
The third section we worked on was the far left and right columns of the center screen. These are hit by 4 ADJ 64’s. Similar to the back section these also are hit from the bottom with two LED bar lights.
Lastly the front two outside sections. These were the most difficult sections to light since they are out front and hit with our white stage lights. Unfortunately we were not able to hit these sections from the top, they are only hit from the bottom. Each section has 3 of the Amazon LED can lights (Coidak CO820). 2 of the 3 hit the front part and the 3rd hits the back of the section.
We did this because people sitting on the far outsides of the sanctuary would be able to see some of the side of the PVC that was not lit.
Other lighting that is not really part of the PVC pipes are 5 LED cans in the drum cage to light up the drum set then another LED strip tape on the top of the drum cage that wraps around the sides.
The strip of tape across the top of the cage seems to visually help it become part of the set. As simple as it it. Typically the cage is an eyesore because of how overly engineered it is to stop sound but adding a little color both inside and out seems to make it more intentionally a part of the stage.
Design & Production Teams
Minooka Bible Church
412 N Wabena Ave.
Minooka, IL 60447


